Jeti
Introduction
A remote controller must be paired with a specific Vertex One to be able to control the drone. This is performed in the factory, so your Vertex One is paired with the RC controller. Pairing may be lost due to an unexpected error or the replacement of the transmitter/receiver. In that case a manual pairing procedure is explained here.
Pairing Indication
Vertex One doesn't react to commands from remote controller. Check first that the RC is configured properly and the correct flight mode is selected and both Vertex One and RC are fully charged. Make sure that potential sources of transmission disruption, e.g. other communication/control devices nearby are switched off.
Pairing Procedure
The following steps explain how the pairing process works.
- Turn on the Remote controller and select the model dedicated to this Vertex.
- Press yes when asked to 'Start transmitter?'.
- Press the 'menu' button to enter the menu to select a model.
- Use the wheel underneath the menu button to navigitate the menu.
- Press the wheel to select and menu item.
-
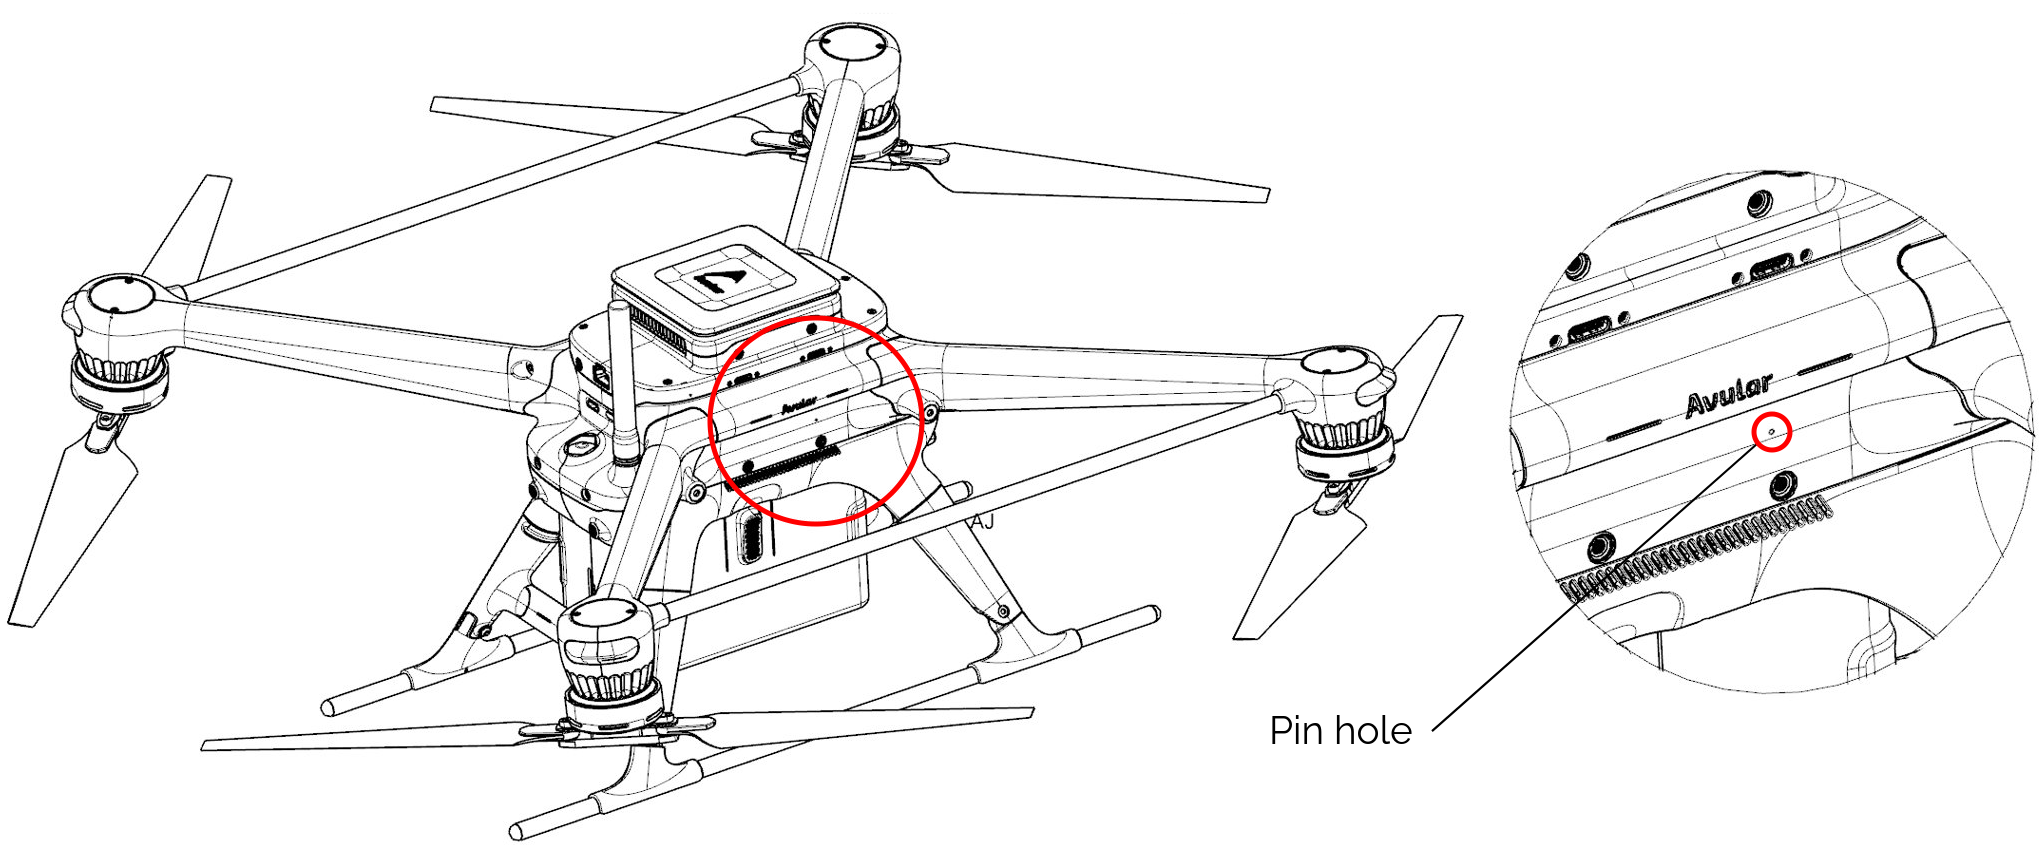
Locate the pairing button pinhole.
-
Use a thin object to press and hold the pair button inside the Vertex One pinhole. This pinhole is located on the right side of the Vertex One.
- While keeping the button pressed, turn on the drone. The remote controller shall ask if you want it to pair with the Vertex One.
- Incase you want to pair the drone to the currently selected model:
- Keep the button pressed until the remote controller shows 'Wrong model selected!'
- Press 'Ok'.
- Press Yes when asked 'Really use this receiver?'.
- Incase you want to pair the drone to the currently selected model:
- Select 'Yes'. The pairing is finished.
Pairing is succesfull when the remote displays 'Receiver bound' and the top left 'Tx' is showing a signal.